Stylish Dog Food Storage Solutions (& Free Printable Labels!)

Expert tips and free labels? Your dog's food is going to be stylin' in no time.
Copy: Serena Faber-Nelson
Photography: Serena Faber-Nelson
Styling: Serena Faber-Nelson
Nothing says ugly and boring like dog food storage. You’re probably sitting there thinking of dusty old bags sitting out in the garage, half eaten packets of treats and all sorts of unappealing things lurking the in the depths of your cupboards. Monica Gellar would not be proud.
But today is all about saying goodbye to those images, and saying a big fat hello to stylish, safe and modern pet food storage. Because you know what? It’s not as hard as you might think!
Whether you’re storing dry dog food, wet food or treats – here are my top 3 tips for simple, yet ridiculously good looking, pet food storage.
And of course – this post wouldn’t be complete without some free printable labels. You’re welcome.

Dog Food Storage Solution: Dry Food
For most people kibble forms the main part of their pet’s diet, so of course it gets number one billing when we’re talking about storage.
And the biggest obstacle to overcome here? The sheer bulkiness of those bags! Even the smaller bags prove hard to store. Over the years, I’ve tried a number of storage solutions for dry food and my current fave is breaking it down into two parts:
PART 1 – EVERYDAY FOOD
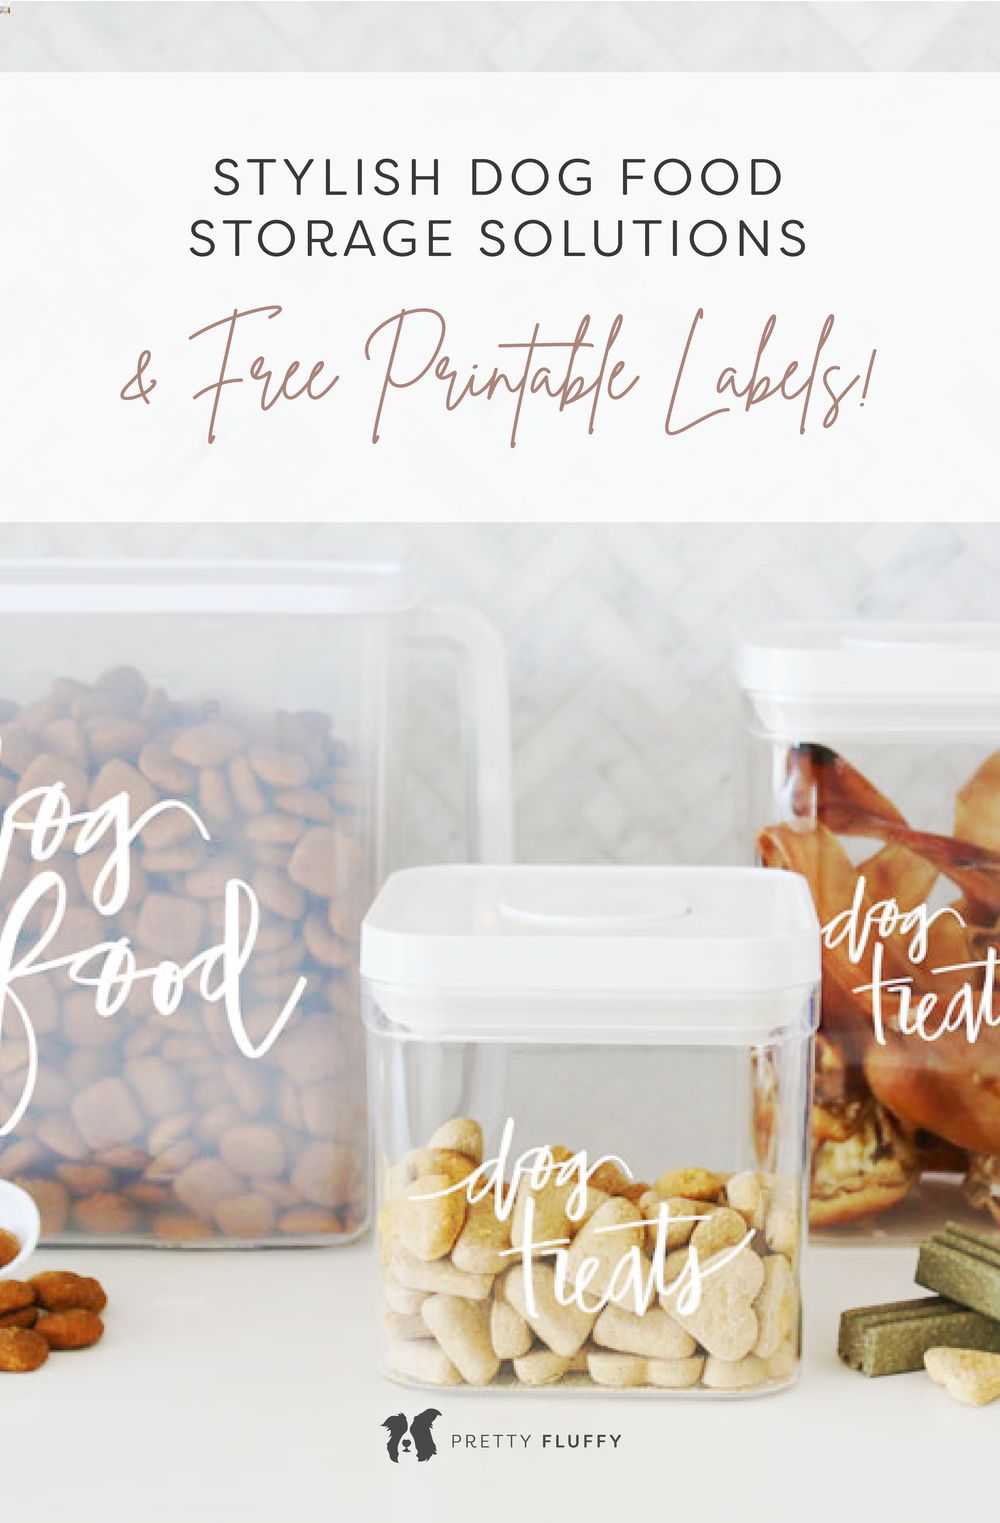
For a simple everyday solution, I use a lightweight, transparent, air tight container with a handle that fits neatly into my pantry. Each week I transfer at least 7 days worth of kibble into this container – which means easy access at dinner time. It genuinely saves so. much. time. And with the cute label (free download below!) it blends seamlessly into a stylish pantry layout.
PART 2 – LONG TERM STORAGE
(Or as I call it – the rest of the bag!) Now, the important thing to know here is pet food companies spend a lot of money on designing pet food bags to keep the food fresh. By keeping the kibble in the bag it comes in, it stays fresh and tasty for your dog. You also have the bag to refer to for expiry dates, and if there are ever any pet food recalls.
Once you’ve poured your weekly kibble into your smaller container, roll your bag tightly shut and seal with a heavy duty clip (remember to keep it airtight – air leads to moisture, mould and bacteria), and pop it at the bottom of your pantry or tucked away in another storage container. I choose to store all my dry dog food in the pantry as it’s cool, dry and out of direct sunlight. While a lot of dog owners leave their dog food in the garage, laundry or shed, the extreme temperatures in these areas don’t make them ideal for pet food storage.
MAKE YOUR OWN DRY FOOD STORAGE
You’ll Need: Air tight container with handle (I use this one)
• Wash your containers thoroughly in warm soapy water, rinse and dry.
• Print out onto your labels and stick them onto your containers. A Silhouette Cameo machine works best here, however if you don’t have one you can print out onto transparent labels (like these).
• Fill your ‘everyday’ container with kibble and you’re set to go!
Download your free printable DOG FOOD labels: WHITE here and BLACK here
Note: The downloads open to a new screen where you need to drag and drop the image to your desktop. As the Black label is on a transparent background, it will look like a black screen.
Tips for Dry Pet Food Storage
- Always keep in an airtight container.
- Store out of direct sunlight, in a cool, dry place away from temperature extremes.
- Dog-proof access to your food.
- Discard any food past the use-by-date.
- Always keep the bag and barcode in case of recalls.

Dog Food Storage Solution: Treats
Hands up who buys pet treats from Petbarn, opens them, and then leaves them lying around the kitchen? Yep, I totally used to do that too. But not anymore. Sister got herself some dedicated treat jars. What’s to love about them?
• They’re inexpensive. Whether you buy dollar store versions, or recycle old honey and coffee jars, treat jars leave you with change in your pocket.
• Their air tight seals keep the treats smelling and tasting fresh to your furry friend.
• Because some treats can be stored for more than a week, glass is preferable over long term plastic storage. However if you use plastic, opt for BPA free versions.
MAKE YOUR OWN DOG TREAT STORAGE
You’ll Need: treat jars (I use these ones)
• Thoroughly wash and dry your jars.
• Print out onto your transparent labels and stick them onto your jars.
Download your free printable DOG TREATS labels: WHITE here and BLACK here
Note: The downloads open to a new screen where you need to drag and drop the image to your desktop. As the Black label is on a transparent background, it will look like a black screen.


Our Favourite Petbarn Treats
Isle of Dogs Natural Health Treats
Dog Food Storage Solution: Wet Food
When it comes to wet food, whether you prefer store bought or home made pet food, both require safe storage. In my experience I’ve found the easiest and safest way is through reusable containers and washi tape labels. Why are they great?
• Once opened, canned pet food ideally should not be left in the tin. It’s not good for the other contents in your fridge, or the quality of the pet food inside. Plus apparently dog food left in the tin doesn’t taste too good. I have NO IDEA who tested out that theory.
• Reusable containers allow the portions of a can or a homemade batch of food to be divided into meal portions and frozen/microwaved where necessary. Again glass is ideal, but BPA free plastic works just as well.
• Washi tape labels are a simple, stylish and cheap way to display use by dates.

MAKE YOUR OWN WET FOOD STORAGE
You’ll Need: Reusable containers, washi tape.
• Simply divide the full amount of wet food into meal portions and place into containers. I tend to pop them into daily portions as they can be heated separately that way and don’t need to be spooned out twice.
• Attach a snippet of washi tape and write on the use by date.
• Once a meal is eaten, simply remove the tape, wash the container and you’re ready to start again.

Copy: Serena Faber-Nelson
Photography: Serena Faber-Nelson
Styling: Serena Faber-Nelson


