


How to Make a Rope Dog Leash
 DIY Projects
Copy: Serena Faber Nelson Photography: Brit + Co / Dog Milk

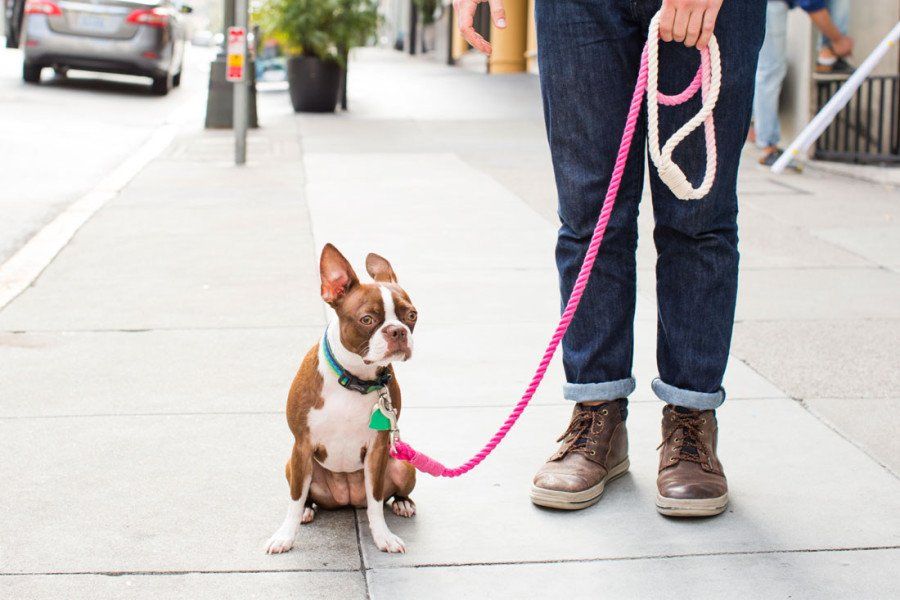
A rope dog leash is one of those accessories that looks expensive but is genuinely simple to make yourself. With a length of rope, some fabric dye, and a few pieces of hardware, you can create a durable, stylish leash in a couple of hours, dip-dyed in whatever colors suit your pup.
This tutorial walks you through the whole process, from choosing your rope to sealing the ends, so you end up with a leash that's both secure and seriously good-looking.
To make a rope dog leash, cut about 6 feet of cotton or nylon rope, form a handle loop at one end and attach a snap hook at the other, then secure both with rope clamps. For an ombre look, dip the rope in fabric dye before assembling. The whole project takes roughly two hours plus drying time and needs no sewing.

Why Make Your Own Rope Dog Leash?
Rope leashes are popular for good reason. The braided construction is strong and comfortable to hold, with just enough give to be gentle on your hands during an enthusiastic pull.
Making one yourself means you choose the length, the thickness, and the exact colors, and it costs a fraction of a designer version.
It also makes a lovely handmade gift for the dog lovers in your life. Pair it with a matching bandana and your pup has a whole coordinated look.
What You'll Need
- Rope: About 6 feet of cotton or nylon rope, roughly half an inch thick. Cotton takes dye beautifully; nylon is extra durable and weather-resistant.
- Snap hook: A sturdy metal clasp to attach to your dog's collar or harness.
- Rope clamps: Metal ferrules or clamps to secure the loops (see the DIY rope clamp tips below).
- Fabric dye: For the dip-dyed or ombre effect.
- Waxed cord or strong twine: For whipping the ends if you prefer a no-clamp finish.
- Strong craft glue and scissors.
- A bucket or deep container for dyeing, plus rubber gloves.
How to Make a Rope Dog Leash: Step by Step
1. Cut Your Rope to Length
A standard leash is about 6 feet long, but remember you'll lose a few inches to the handle loop and the hook attachment. Cut your rope to roughly 6.5 feet to allow for this. If you have a small dog and want a shorter city leash, 4 feet works well. Immediately after cutting, wrap a small piece of tape around each cut end to stop it fraying while you work.
2. Dip-Dye the Rope
This is where the magic happens. Mix your fabric dye according to the packet instructions in a bucket. For a classic ombre effect, dip only the bottom third of the rope first and hold it there, then gradually lower more of the rope in over time so the color fades from deep at the bottom to light higher up. For a tie-dye dog leash, scrunch and bind sections of the rope with rubber bands before dyeing, or apply two colors to different sections. Cotton rope will give you the richest, most even color. Rinse until the water runs clear, then hang to dry completely before moving on.
3. Form the Handle Loop
Once dry, fold one end of the rope back on itself to create a loop big enough for your hand to pass through comfortably, usually around 6 inches. Hold the end against the main length of the rope, ready to secure.
4. Secure the Handle with a Rope Clamp
Slide a rope clamp (a metal ferrule) over the doubled section and crimp it firmly with pliers to hold the loop in place. This is the core of the DIY rope clamp method: the clamp does the work of stitching, giving a clean, secure finish with no sewing.
If you don't have clamps, see the no-clamp alternative below.
5. Attach the Snap Hook
At the other end, thread the rope through the loop of your snap hook, fold it back on itself, and secure it the same way with a second rope clamp. Make sure the hook can swivel and move freely.
This is the end that clips to your dog, so give it a firm tug to check it's completely secure before your dog wears it.
6. Finish the Ends
Trim any excess rope close to the clamps. To stop the cut ends fraying over time, dab a little strong craft glue on them, or for a more polished look, whip the ends tightly with waxed cord. Let everything cure fully, and your leash is ready for its first walk.
How to Make a Dog Leash Out of Nylon Rope
Nylon rope makes an especially tough, weatherproof leash that's ideal for hikes and wet conditions. The steps are the same as above with two key differences.
First, nylon doesn't absorb dye the way cotton does, so if you want color, choose pre-colored nylon rope rather than trying to dip-dye it.
Second, nylon ends fray fast and can be sealed cleanly by carefully melting them with a lighter flame (an adult job, done in a well-ventilated space) rather than relying on glue.
Melting fuses the fibers into a solid, fray-proof tip. Rope clamps hold nylon just as well as cotton, so the handle and hook attachment stay exactly the same.
No-Clamp Alternative: Whipping the Ends
If you can't get rope clamps, you can secure the loops the traditional sailor's way by whipping them with waxed cord.
Wrap the cord tightly and repeatedly around the doubled rope section, working over the top of the loose end to bind it, then tie off and tuck the tail underneath.
This takes a little longer than clamping but needs no tools and gives a soft, handmade finish. It's also the sturdier choice if your dog is a strong puller, since there's no hard metal piece to eventually loosen.
Tips for the Perfect DIY Rope Leash
- Match the rope thickness to your dog. A half-inch rope suits most dogs. Go thicker for large, strong breeds and thinner for small dogs where a chunky rope would feel clumsy.
- Always test the hardware. Before every early walk, pull firmly on both the handle loop and the hook to confirm the clamps are holding.
- Pre-wash cotton rope before dyeing to remove any coating that could resist the dye.
- Coordinate your colors. A dip-dyed leash looks great matched to a homemade accessory. Our dog party projects and DIY crafts are full of color inspiration.
FAQ
Frequently asked questions
1What rope is best for a dog leash?
Cotton and nylon are the two best choices. Cotton rope is soft, comfortable to hold, and takes fabric dye beautifully, making it ideal for a dip-dyed or ombre leash.
Nylon rope is more durable and weather-resistant, which suits hiking and wet conditions, though it doesn't absorb dye well. For most dogs, a half-inch thick braided rope offers the right balance of strength and comfort.
2How long should a DIY dog leash be?
A standard dog leash is around 6 feet, which gives your dog room to explore while keeping them under control. For busy city walking, a shorter 4-foot leash offers more control. When cutting your rope, add a few extra inches to account for the length lost to the handle loop and the hook attachment.
3How do you attach a clasp to a rope leash without sewing?
The easiest no-sew method is a rope clamp, also called a ferrule. Thread the rope through the clasp, fold it back on itself, slide a metal clamp over the doubled section, and crimp it firmly with pliers. This holds the clasp securely with no stitching. Alternatively, you can whip the end tightly with waxed cord for a traditional, tool-free finish.
4How do you dip-dye a rope leash?
Use cotton rope, since it absorbs color best. Mix fabric dye in a bucket per the packet instructions, then dip the bottom section of the rope first and gradually lower more of the rope in over time to create a fading ombre effect. Rinse until the water runs clear and let the rope dry completely before assembling the leash. For a tie-dye look, bind sections with rubber bands before dyeing.
5Is a homemade rope leash strong enough?
Yes, when made correctly. A braided cotton or nylon rope of appropriate thickness, secured with properly crimped rope clamps or tightly whipped ends, creates a leash strong enough for everyday use. Always match the rope thickness to your dog's size and strength, and test the handle and hook attachments firmly before each of the first few walks to be sure everything is secure.
6Loved this project?
Try more easy DIYs like our no-sew dog bandana, our DIY dog piñata, and our natural mosquito repellent for dogs. Browse all our DIY dog projects for more inspiration.
Pretty Fluffy is the ultimate lifestyle destination for dog lovers. Discover the best designer dog brands and emerging small pet businesses, the latest dog accessories, healthy dog treat recipes, dog training tips and more. Thank you for being part of our dog-loving community!
Related Reading


Share a thought, ask a question, or tell us about your own dog. We read every comment.