


How to Make a Dog Bandana (No Sew)
 DIY Projects
Copy: Serena Faber Nelson Photography: Serena Faber Nelson Styling: Serena Faber Nelson

There is something undeniably cute about a dog in a fresh bandana. It adds a perfect pop of personality to their daily walk.
But if the thought of threading a needle makes you nervous, this project is exactly what you need.
We're making a no-sew dog bandana that slips right over your dog's existing collar.
It's safer than the tie-on kind since it won't fall off during play, it looks incredibly professional, and it requires absolutely zero sewing skills.
To make a no-sew dog bandana, cut two matching pieces of cotton fabric into an envelope shape, iron the edges to hem them, then bond the layers together with heat-activated hemming tape. Fold the top section down to create a loop, seal it with more tape, and slide your dog's collar through. The whole project takes about 20 minutes.

Why Make Your Own Dog Bandana?
Custom pet accessories can get expensive, which isn't ideal if your dog loves rolling in the mud. Making them yourself saves money and lets you choose the perfect fabric for your pup's personality. Here's why you'll love this method:
- No sewing required: We use heat-activated bonding tape that's strong, durable, and comes together in minutes.
- Secure fit: The bandana slides right onto the collar, so it stays comfortable and won't get lost.
- Easy to swap: Change styles instantly whenever you want a new look.
- Zero waste: It's the perfect excuse to use up those colorful fabric scraps hiding in your drawer.
What You'll Need
You don't need a fully stocked craft room for this. In fact, you might already have everything lying around the house.
- Fabric scraps: Cotton works best because it irons well. You'll need pieces at least 14 x 14 inches.
- Scissors: Sharp fabric scissors give the cleanest edges.
- Iron: This is your "sewing machine" for the day.
- Hemming tape: Often called "stitch witchery," this melts to bond the fabric.
- Dog collar: Have your dog's regular flat collar handy to measure the loop size.
- Pencil and ruler: Essential for getting that symmetrical bandana shape.

How to Make a No-Sew Dog Bandana: Step by Step
Clear off a bit of table space and set up your ironing board. This process is very forgiving, so relax and have fun with it.
1. Draw Your Template
Lay your fabric flat with the patterned side facing down. You'll draw your guidelines directly on the back of the fabric, and the shape you're aiming for looks a lot like an open envelope.
Draw a rectangle about 10 inches wide and 5 inches high, placing the bottom of the rectangle at the edge of your fabric.
Then draw a triangle sitting perfectly on top of that rectangle. The rectangle part is important because it eventually folds over to create the loop for the collar.
2. Cut the Fabric Pieces
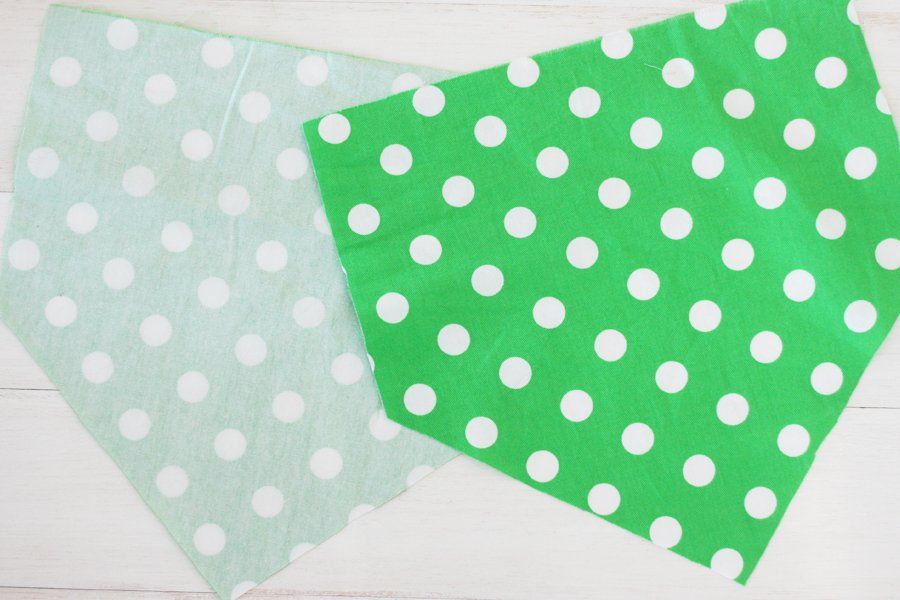
Once you're happy with your outline, cut it out carefully. You need two identical pieces of fabric to make the bandana sturdy and give it a polished finish on both sides.
If you're using patterned fabric, pay attention to the direction of the print so it doesn't end up upside down.
Use your first cut piece as a stencil for the second to ensure they match perfectly.
3. Iron the Hems
Now create neat edges. Take each piece of fabric and fold the edges in about half an inch toward the back side.
Press these folds down firmly with your hot iron. This step hides the raw edges and prevents fraying, giving your no-sew bandana that clean, store-bought look.
Do this for all sides on both pieces of fabric.
4. Bond the Layers Together
Place one piece of fabric on your ironing board with the folded hems facing up. Cut strips of your hemming tape and lay them along the edges you just ironed.

Place the second piece of fabric on top, patterned side facing out like a sandwich, making sure the edges align nicely.
Run your hot iron over the fabric to melt the tape and bond the two layers together. If any spots feel loose, just apply a bit more heat.
5. Form the Collar Loop
You're nearly there. Fold the top rectangle section of the bandana down to create a casing for the collar. Before you seal it, hold it up to your dog's collar to make sure the loop is wide enough for the buckle to slide through easily.
Place a final strip of hemming tape across the bottom of this fold and iron it securely.
Let the fabric cool completely so the bond sets, then slide the collar through.

How to Make a Reversible Dog Bandana
Want a bandana with two looks in one? Making it reversible is simple: use two different fabrics for the front and back instead of the same fabric on both sides.
Follow the exact same steps, choosing two coordinating prints or a print and a solid.
Once bonded, you'll have a bandana you can flip depending on your dog's outfit or the occasion. It's the easiest way to get more mileage out of a single project.
How to Make a Dog Cooling Bandana
On hot days, a cooling bandana helps your dog stay comfortable.
To make one, follow the same no-sew method but leave the top loop casing open at both ends so you can slide a cooling insert or a rolled damp cloth through it.
Alternatively, make a slightly larger version and soak the whole bandana in cool water before your walk.
Choose a lightweight cotton so it holds moisture without getting heavy. Always check that your dog is comfortable and never leave a wet bandana on a dog who is shivering or showing signs of being too cold.

Sizing Tips for Every Dog
The measurements above suit a medium dog, but this pattern adjusts easily. For a tiny dog or a large breed, simply scale the starting rectangle up or down.
A good rule of thumb: the finished triangle should sit comfortably on your dog's chest without hanging past their collar line.
If you're unsure, measure a bandana or scarf your dog already wears and match those dimensions. When in doubt, cut slightly larger. You can always trim before bonding.
How to Care for Your No-Sew Dog Bandana
Because this bandana uses heat-activated tape instead of thread, hand washing is the safest way to keep it intact for the long haul. Machine washing and high-heat drying can loosen the bond over time.
To clean, gently hand wash in cool water with a mild detergent, reshape, and lay flat to dry. Treated this way, your bandana will hold up walk after walk.
FAQ
Frequently asked questions
1How do you make a dog bandana without sewing?
Cut two matching pieces of cotton fabric into an envelope shape, fold and iron the edges to hem them, then bond the two layers together using heat-activated hemming tape and a hot iron. Fold the top section down to form a collar loop, seal it with another strip of tape, and slide your dog's collar through once cooled. No needle or thread required.
2What fabric is best for a dog bandana?
Cotton is the best choice for a no-sew dog bandana. It irons well, holds a crisp fold, and bonds cleanly with hemming tape.
Lightweight quilting cotton is ideal for everyday bandanas, while a slightly heavier cotton works well if you want more structure. Avoid stretchy or synthetic fabrics, which don't hold their shape or bond as reliably.
3What size should a dog bandana be?
For a medium dog, start with fabric pieces around 14 x 14 inches and a base rectangle about 10 inches wide. Scale up for large breeds and down for small dogs. The finished triangle should rest comfortably on your dog's chest without hanging below the collar. Measuring a bandana your dog already wears is the easiest way to get the size right.
4Can I make a dog bandana with a glue gun instead of hemming tape?
Hemming tape is strongly recommended because it creates a flat, flexible, even bond across the fabric. A glue gun can leave stiff, lumpy seams and may not hold up to washing as well. If hemming tape is all you're missing, it's worth picking some up. It's inexpensive and gives a far more professional finish.
5Are slide-on dog bandanas safe?
Slide-on bandanas that thread onto the collar are generally considered safer than tie-on styles because there's no knot that can come loose or tighten during play. As with any accessory, supervise your dog while they wear it, make sure the collar itself fits properly, and remove the bandana when your dog is crated or unsupervised for long periods.
Your dog is now ready to strut their stuff with a custom accessory you made with your own hands. For more easy dog projects, try our DIY natural mosquito repellent, or browse all our DIY dog projects for more inspiration.

Pretty Fluffy is the ultimate lifestyle destination for dog lovers.Discover the best designer dog brands and emerging small pet businesses, the latest dog accessories, healthy dog treat recipes, dog training tips and more.Thank you for being part of our dog-loving community!
Related Reading


Share a thought, ask a question, or tell us about your own dog. We read every comment.