
Upcycled Ombre DIY Dog Feeder

Copy: Serena Faber Nelson
Photography: Serena Faber Nelson
Styling: Serena Faber Nelson
My favourite kind of DIYs? The ones that are simple, easy and only take a few steps to complete. This DIY Dog Feeder tutorial ticks all those boxes!
During my holiday spring clean, I came across this old duck board that had been used for a myriad of things over the course of 7 plus years in our current home. I was getting ready to pop it in the recycling pile, when I had an idea:
This mat could be the perfect feeder to stop Soda’s food and water bowls sliding and scratching the floor. Plus I recently read, the less a dog has to lean down to eat, the easier their digestion.

But I couldn’t have some raggedy old duck board that has lived on the back porch gathering cobwebs for the last year get pride of place. No it needed some dressing up. Enter the DIY Ombre Pet Feeder. Here’s the DIY in 4 simple steps.
YOU’LL NEED
Old or new duckboard.
Sandpaper (if board is old).
Paint in your favourite colour.
White paint.
Paint brush.
Craft paint sealer.

DIY Dog Feeder – DIRECTIONS
1. Sand down your old duckboard to get a smooth finish to the wooden slats on top. Clean off all residue. (You don’t need to do this if board is new.)
2. Mix your paints – to get the ombre effect you’ll need the full colour for Slat #1, a light shade (your original colour mixed with white) for Slat #2 and white paint for Slat #3. Feel free to experiment if you want to paint every slat. I just liked the rustic feel by leaving the remaining slats.
3. Coat each slat with a number of coats, allowing each coat to fully dry before the next, until you reach desired coverage.
4. Apply a craft paint sealant to all painted slats.
Couldn’t be easier! A quick, fun and easy way to brighten up your pet’s feeding station without blowing the bank.

Pet lifestyle expert Serena Faber-Nelson is the founder of Pretty Fluffy. A contributor to Everyday with Rachael Ray, Modern Dog Magazine, Cesars Way and more; her modern, stylized take on DIY dog treats has seen her recipes viewed millions of times over.
Serena is the author of the go-to dog mom bible, Dog Mama, and the popular dog treat recipe book, Healthy Homemade Dog Treats.
Copy: Serena Faber Nelson
Photography: Serena Faber Nelson
Styling: Serena Faber Nelson


-
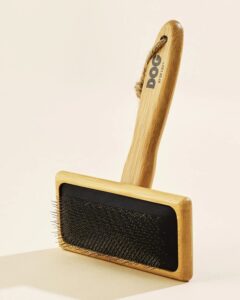
 DOG By Dr Lisa Dog Brush
lovely everyday brush for dog parents who want something gentle and easy to use.

-
DOG By Dr Lisa Dog Brush
lovely everyday brush for dog parents who want something gentle and easy to use.
Where did you get the duckboard? I am having a hard time finding some!
Hi I’m Polish. I fell in love these bowls. I’ve never seen prettier. I do not have the possibility to buy them. Can you send me a website where they are available. The page, which you sent to Hannah are not good. Because Paddopets do not have an online store, at petworldshop- I can not buy anything, I can only see them. Very sorry for my terrible English language skills.
Victoria and her Golden Retriever- Nula
I love this easy diy project. Not only is it beautiful, it looks really durable too 🙂
I always love it when you feature pictures of Soda. She is just so beautiful and always looks so happy 🙂 Love your website…..
these turned out great!
Thanks Jane!
What a great idea! It looks fab , love it!
Thanks Cate – a super easy one too 🙂
I love this Serena. Cash is a little tight at the moment so all these DIY ideas are great. And yes another person to ask – where are the bowls from?
I just found the same bowls here http://www.petworldshop.com/castlemere/color-blocks-elevated-feeders.php
Great DIY by the way! I will definitely try this for my new golden retriever puppy 🙂
Alex – a pleasure!
Laura – thanks so much for finding them, I bought mine about 5 years ago 🙂
LOVE THIS, Rene! Soda is dining in style!!
Thanks Sar!
Where did you get Soda’s food and water dishes? — love!!
Hi Hannah, I bought Soda’s dishes a while back at Paddo Pets (http://www.paddopets.com.au/), however Pet World Shop also has them (thanks to Laura for the link below!) – http://www.petworldshop.com/castlemere/color-blocks-elevated-feeders.php